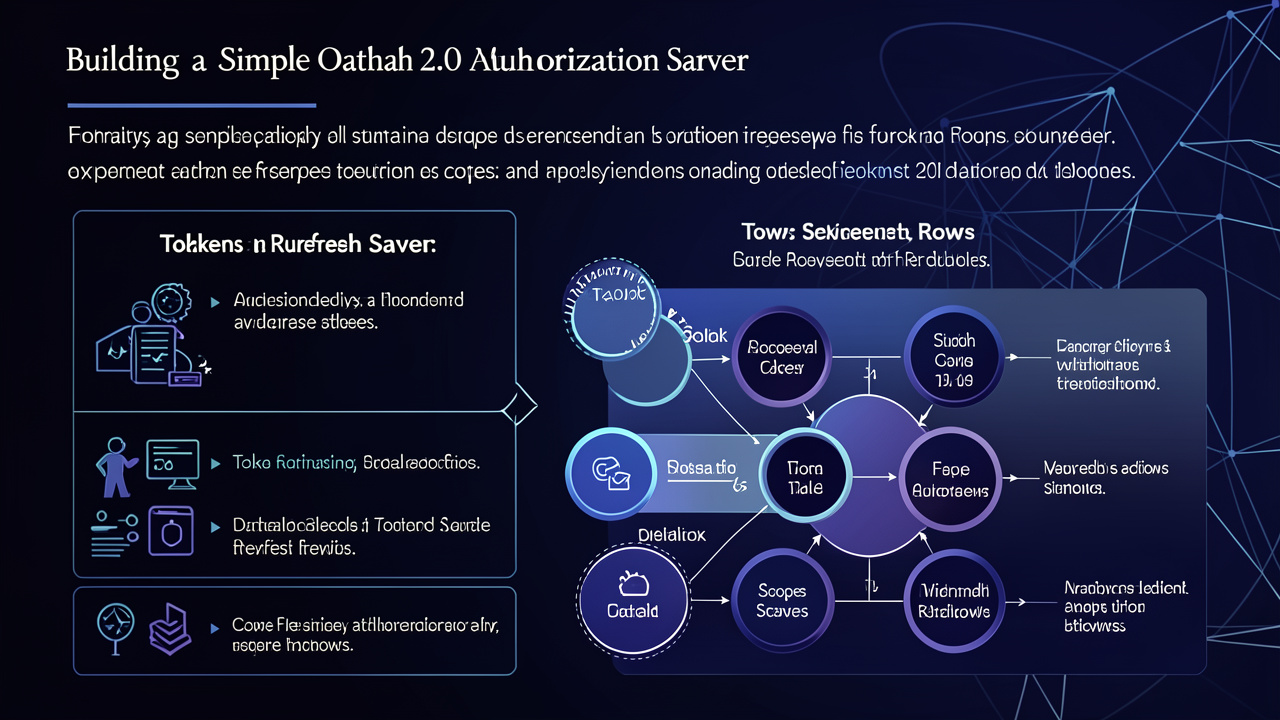
Building A Simple Oauth 2.0 Authorization Server: Tokens, Scopes, And Refresh Flows
A comprehensive technical exploration of building a simple oauth 2.0 authorization server: tokens, scopes, and refresh flows, covering key concepts, practical implementations, and real-world applications.
Contents
Excellent. This is a fantastic starting point. You have a strong narrative hook and a clear understanding of the problem space. Reaching 10,000 words requires not just more text, but more depth. We need to turn the introduction into the first chapter of a book. We will expand the historical context, deepen the technical explanation of each component, and add forward-looking sections on implementation pitfalls, security considerations, and practical code.
Here is the expanded version, building on your excellent foundation.
Title: Building A Simple OAuth 2.0 Authorization Server: Tokens, Scopes, And Refresh Flows
Introduction
Imagine you are standing at the edge of a digital fortress. The fortress holds your photographs, your private messages, your financial history, and the intricate map of your social connections. You want to grant a new visitor—a trusted friend’s photo-printing application, for instance—permission to enter only the library wing, specifically to retrieve the vacation album from last summer. You do not want them to have keys to the dungeon, the treasury, or the throne room. You also do not want to give them your master key, the password to your entire identity, because if they lose that single slip of paper, the entire fortress is compromised.
This is the precise, ancient problem of digital authorization, and for decades, the solution was a nightmare. Before the widespread adoption of OAuth 2.0 (which matured around 2012), the common pattern was password anti-pattern delegation. If you wanted a service to print your photos from Flickr, you literally gave them your Flickr username and password. The photo app would log in as you, perform a massive, un-scoped data dump, and pray it didn’t get hacked. It was a system built on blind trust and catastrophic risk.
Then came the revolution. OAuth 2.0 didn’t just fix this problem; it re-architected the entire concept of digital trust. It introduced a framework where the user (the Resource Owner) can grant limited, revocable access to a third-party application (the Client) without ever exposing their credentials. This magic is performed through a series of carefully orchestrated steps involving tokens, scopes, and authorization codes.
To truly appreciate the elegance of OAuth 2.0, we must first journey into the dark ages from which it emerged. The landscape of the early 2000s was a digital Wild West. Protocols like HTTP Basic Authentication were the norm. Under Basic Auth, a client would send a username and password encoded in Base64 (which is not encryption, merely encoding) in every request header. This meant that every single API call carried the golden key to the kingdom. If an application was compromised, either through a man-in-the-middle attack or a server-side breach, the attacker gained unfettered access to the user’s entire account – forever, until the password was changed.
Worse still was the password anti-pattern for delegation. Consider the scenario mentioned earlier with Flickr. In 2006, if you wanted to use a third-party service like a photo book creator, you had to hand over your Flickr credentials. This created a cascade of security nightmares. The third-party app stored your password, often in plaintext or with weak hashing, on their own servers. A breach of that service exposed your main identity credential. There was no concept of “scoped access.” The photo app could, in theory, delete your photos, change your profile, or even send messages as you. The trust model was binary: you either gave away your entire identity, or you didn’t use the service.
The tech industry recognized this was unsustainable. In 2006, a group of engineers from Twitter, Google, and other major internet companies began working on what would become OAuth. The initial draft, often called OAuth 1.0, was a radical departure. It introduced cryptographic signatures for every request, eliminating the need to transmit the password over the wire for API access. However, OAuth 1.0 was notoriously difficult to implement. The signature generation process required careful canonicalization of request parameters, which led to countless subtle bugs. It was secure, but it was a developer nightmare.
OAuth 2.0, released as RFC 6749 in October 2012, learned from these lessons. It traded the mandatory cryptographic signatures of OAuth 1.0 for the simplicity of TLS (HTTPS) as the foundation of transport-layer security. This was a pragmatic decision. By 2012, HTTPS was becoming widespread and affordable. OAuth 2.0 also introduced a clean separation of roles and a pluggable architecture of grant types – a series of pre-defined flows designed for different client scenarios, from server-side web apps to mobile devices to server-to-server integrations.
Here is where we stand today. OAuth 2.0 is the silent backbone of modern internet. When you click “Sign in with Google,” “Log in with Facebook,” or grant a mobile app access to your phone’s camera roll, you are participating in an OAuth 2.0 flow. It authorizes services like Zapier to connect your Gmail to your Slack and your Trello board, all without knowing a single password. The protocol is a foundational pillar of distributed systems, API gateways, and microservice architectures.
Understanding OAuth 2.0 is no longer optional for a backend engineer; it is a core competency. In this comprehensive guide, we will not just describe the protocol. We will roll up our sleeves and build a fully functional, though simplified, OAuth 2.0 Authorization Server from scratch. We will use Python and the Flask web framework to bring the abstract concepts to life. By the end of this post, you will understand not just what an authorization server does, but how it does it.
We will cover the three essential artifacts of OAuth 2.0: the Authorization Code, the Access Token, and the Refresh Token. We will implement scopes, the mechanism for fine-grained permissions. We will handle the entire lifecycle of a token, from issuance to validation to expiration and refresh. We will also confront the practical, security-critical decisions that a real implementation must make, such as token storage, revocation, and the ever-present threat of CSRF (Cross-Site Request Forgery).
Our journey will follow a single, concrete story: A user named Alice wants to grant a third-party photo editor (the “Client”) temporary, scoped access to her profile picture stored on our server (the “Resource Server”). We will walk through each HTTP request and response, decode the cryptographic underpinnings of our tokens, and debug the common pitfalls that plague new implementations. By the end, you will have a running authorization server and a deep, intuitive grasp of one of the most important protocols in distributed systems.
The Core Cast: The Four Roles of OAuth 2.0
Before we write a single line of code, we must understand the dramatis personae of our digital play. OAuth 2.0 defines four distinct roles that interact in a carefully choreographed dance. Understanding these roles is crucial because the same physical server might play multiple roles, and the security of the entire system depends on each role performing its specific duties correctly.
1. The Resource Owner (Alice) This is the user, the entity that owns the data or resources. In our fortress analogy, this is the monarch. Alice has the ultimate authority to grant or deny access. In the OAuth flow, her interaction is primarily through a web browser or mobile app. Her critical action is to authenticate herself (prove who she is) and then explicitly consent to a specific set of permissions (scopes) for a specific client application. The entire protocol is designed to protect Alice from accidentally giving away too much power.
2. The Client Application (The Photo Editor)
This is the third-party application that wants to access Alice’s resources. It can be a web application, a mobile app, a smart TV app, or even a script running on a server. The Client has its own identity, defined by a client_id and a client_secret. The client_id is public, like a username for the application. The client_secret is a private credential that the Client uses to prove its identity to the Authorization Server. The Client initiates the OAuth flow and ultimately uses the Access Token to fetch data on behalf of Alice.
3. The Authorization Server (Our Server) This is the core of our implementation. It is the server that Alice trusts with her credentials. Its jobs are:
- Authentication: Verify Alice’s identity (usually with a username/password).
- Authorization: Record Alice’s consent to a specific Client and scope.
- Token Issuance: Generate and issue the Authorization Code, Access Token, and Refresh Token.
- Token Validation: Provide an endpoint for the Resource Server to verify that an Access Token is valid and has the required scopes.
- Token Revocation: Allow Alice or the Client to invalidate a token before it expires.
4. The Resource Server (The API) This server hosts the protected data—Alice’s photos, emails, documents. When a Client makes a request to the Resource Server with an Access Token, the Resource Server must validate that token. Typically, this involves either calling the Authorization Server’s introspection endpoint or, more efficiently, validating the token locally if it is a cryptographically signed token like a JSON Web Token (JWT). In a simpler architecture, the Authorization Server and Resource Server are the same physical server. In production at scale, they are often separated for performance and security.
The Grant Types: Choosing the Right Flow
OAuth 2.0 is not a single protocol; it is a framework of protocols called grant types. Each grant type is designed for a specific type of client and security context. Choosing the wrong grant type is one of the most common security mistakes in OAuth implementations.
Authorization Code Grant (The Most Secure): This is the default and recommended flow for server-side web applications (like a standard Rails, Django, or Node.js app). The Client never sees the user’s password. Instead, the Client receives an Authorization Code that can be exchanged for an Access Token. Crucially, this token exchange requires the Client’s
client_secret, which is stored securely on the server. This flow is immune to many common attacks because the token is never exposed to the user’s browser. This is the flow we will implement.Implicit Grant (Deprecated): This flow was designed for browser-only applications (think single-page apps like Angular or React) that cannot securely store a
client_secret. Instead, the Access Token is returned directly in the URL fragment from the Authorization Server. This was always less secure because the token was exposed in the browser history, to browser extensions, and via referrer headers. The industry has largely moved away from this in favor of the Authorization Code Grant with PKCE (Proof Key for Code Exchange), which we will discuss.Client Credentials Grant: This is for machine-to-machine communication. There is no user (no Alice). A server application (like a background cron job) authenticates itself using its
client_idandclient_secretdirectly to get an Access Token. This is used for APIs that should be called by trusted services, not by user-facing applications.Resource Owner Password Credentials Grant (The Legacy Anti-Pattern): This is the direct login flow. The Client asks for Alice’s username and password and then exchanges them for an Access Token. This is essentially the old anti-pattern we are trying to avoid. It is only recommended for highly-trusted first-party applications (like a mobile app for your own service) and should be avoided otherwise. We will not implement this.
For our current project, we will build the Authorization Code Grant. It is the most instructive, the most secure, and the foundation of modern delegated authorization.
Setting the Stage: A Concrete Use Case
Let’s be specific about our scenario.
- Alice is a user of
photos.example.com. - Photos.example.com acts as both the Authorization Server and the Resource Server in our simplified setup.
- Alphabetica is a third-party web application (the Client) that creates photo books. Alice wants to use Alphabetica to create a book of her summer photos. Alphabetica asks for permission to read her photos and to see her profile data (name and email). It does not need permission to delete photos or change her password.
- The goal: Alice visits Alphabetica’s site. She clicks “Connect to Photos.” She is redirected to
photos.example.com, where she logs in and sees a consent screen that says “Alphabetica wants to:view:photosandview:profile.” She clicks “Allow.” She is then redirected back to Alphabetica, which now has a temporary code. Alphabetica exchanges this code for an Access Token and a Refresh Token. It then uses the Access Token to call the/api/photosendpoint onphotos.example.comand retrieves Alice’s summer photos.
This is the story we will bring to life with code.
Prerequisites and Technology Stack
To follow along, you will need:
- Python 3.8+
- The Flask web framework (
pip install flask) - The
PyJWTlibrary for creating and verifying JSON Web Tokens (pip install pyjwt) - The
cryptographylibrary for advanced JWT support (pip install cryptography) requestslibrary for the client example (pip install requests)- A basic understanding of HTTP, REST APIs, and Python.
We will build our Authorization Server in a single, well-structured Python file, auth_server.py. We will create a simple, in-memory “database” using Python dictionaries to keep the focus on the OAuth logic, not the database schema. In production, you would use a persistent store like PostgreSQL or Redis.
Part 1: The Authorization Server Foundation
Let’s start by scaffolding our Flask application and defining our in-memory data structures.
# auth_server.py

import os
import uuid
import hashlib
from datetime import datetime, timedelta, timezone

import jwt
from flask import Flask, request, jsonify, redirect, render_template_string

app = Flask(__name__)

# --- Configuration ---
# In production, this comes from environment variables.
app.config['SECRET_KEY'] = os.urandom(24).hex()
AUTHORIZATION_SERVER_URL = "http://localhost:5000"
ACCESS_TOKEN_EXPIRY_MINUTES = 15
REFRESH_TOKEN_EXPIRY_DAYS = 30

# --- In-Memory Databases (Replace with real DB in production) ---
# Users: username -> {password (hashed!), ...}
users = {
    "alice": {
        "password_hash": hashlib.sha256("secure-password-123".encode()).hexdigest(),
        "profile": {"name": "Alice Wonderland", "email": "alice@example.com"}
    }
}

# Registered Clients: client_id -> {client_secret, redirect_uris, ...}
clients = {
    "alphabetica": {
        "client_secret": "a-very-secret-string-for-alphabetica",
        "redirect_uris": ["http://localhost:5001/callback"]
    }
}

# Authorizations: authorization_code -> {...}
authorization_codes = {}

# Access Tokens: access_token (JTI) -> {...}
access_tokens = {}

# Refresh Tokens: refresh_token -> {...}
refresh_tokens = {}
Explanation:
- We start Flask and set a secret key for session signing.
usersis a dictionary mapping usernames to dictionaries containing a SHA-256 hash of the password. In production, you must use a proper password hashing library likebcryptorargon2. We use a simple hash here for demonstration.clientsstores our registered applications. Each client has aclient_secretand a list of allowedredirect_uris. The redirect URI is a critical security parameter; the Authorization Server will only send authorization codes to these pre-registered URLs.- We create empty dictionaries for our codes and tokens. We will populate them as we go.
Part 2: The Authorization Endpoint
Our first endpoint is the /authorize endpoint. This is the URL that the Client redirects the user to. It must authenticate the user and ask for consent.
The HTTP Request from the Client:
GET /authorize?response_type=code&client_id="if7de0165915151e1e34a3bee35b"
Query Parameters Explained:
response_type=code: This tells the Authorization Server we want an Authorization Code grant.client_id="i1d5de2059">: Identifies the Client.redirect_uri: Where to send the user after authorization. Must match a registered URI for the client.scope: A space-separated (or+-separated) list of requested permissions. We use custom scopes likeview:photosandview:profile.state: A random, unguessable value generated by the Client. This is crucial for preventing Cross-Site Request Forgery (CSRF). The Authorization Server must echo this value back to the Client unchanged when it redirects the user.
The Endpoint Implementation:
@app.route('/authorize', methods=['GET'])
def authorize():
    """Step 1 of Authorization Code Grant: Authenticate user and get consent."""
    client_id = request.args.get('client_id')
    redirect_uri = request.args.get('redirect_uri')
    scope = request.args.get('scope')
    state = request.args.get('state')
    response_type = request.args.get('response_type')

    # --- Validation ---
    if not client_id or not redirect_uri or not response_type:
        return "Missing required parameters", 400

    if client_id not in clients:
        return "Unknown client", 400

    if redirect_uri not in clients[client_id]['redirect_uris']:
        return "Invalid redirect URI", 400

    if response_type != 'code':
        return "Unsupported response type", 400

    # --- User Authentication (Simplified) ---
    # In a real app, you'd have a login form.  We simulate it.
    username = request.args.get('username')  # For demo: pass as query param
    password = request.args.get('password')

    # We'll use a simple GET parameter login for this demo.
    # In reality, this would be a POST form.
    if not username or not password:
        # Render a simple login page.
        login_form = """
        <form method="GET" action="/authorize">
            <input type="hidden" name="client_id" value="{{ client_id }}">
            <input type="hidden" name="redirect_uri" value="{{ redirect_uri }}">
            <input type="hidden" name="scope" value="{{ scope }}">
            <input type="hidden" name="state" value="{{ state }}">
            <input type="hidden" name="response_type" value="{{ response_type }}">
            <label>Username: <input type="text" name="username"></label><br>
            <label>Password: <input type="password" name="password"></label><br>
            <button type="submit">Log In</button>
        </form>
        """
        return render_template_string(login_form, **request.args)

    # Verify credentials
    if username not in users or \
       hashlib.sha256(password.encode()).hexdigest() != users[username]['password_hash']:
        return "Invalid username or password", 401

    # --- Consent (Simplified) ---
    # We skip the consent screen for this demo.  In production, you'd show
    # "Alphabetica wants to: view:photos, view:profile.  Allow? [Yes] [No]"
    # For our demo, we assume consent was given if login was successful.

    # --- Generate Authorization Code ---
    auth_code = str(uuid.uuid4())
    authorization_codes[auth_code] = {
        'client_id': client_id,
        'username': username,
        'scope': scope,
        'redirect_uri': redirect_uri,
        'expires_at': datetime.now(timezone.utc) + timedelta(minutes=1)  # Codes are short-lived
    }

    # --- Redirect back to client ---
    redirect_url = f"{redirect_uri}?code={auth_code}&state={state}"
    return redirect(redirect_url, 302)
Key Points:
- We validate every parameter. Invalid
client_idor non-matchingredirect_uriresults in an error. - We simulate a login form. In reality, you’d use a POST endpoint with proper CSRF protection.
- We generate a
uuid4as the authorization code. This code is short-lived (1 minute). - The code is stored in our in-memory database with its associated client, user, and scope.
- The
stateparameter is echoed back in the redirect URL. If the Client receives astatethat doesn’t match what it sent, it must abort.
Part 3: The Token Endpoint
The Client uses the Authorization Code to obtain an Access Token. This is a back-channel request (server-to-server), which is a key security feature. The exchange happens server-side, so the token is never exposed in the user’s browser.
The HTTP Request from the Client:
POST /token
Content-Type: application/x-www-form-urlencoded

grant_type=authorization_code&code=THE_AUTH_CODE&redirect_uri=http://localhost:5001/callback&client_id="ie669b706755aa46348383b92c58b2e4"
The Endpoint Implementation:
@app.route('/token', methods=['POST'])
def token():
    """Step 2: Exchange authorization code for tokens."""
    # --- Parse request ---
    grant_type = request.form.get('grant_type')
    code = request.form.get('code')
    redirect_uri = request.form.get('redirect_uri')
    client_id = request.form.get('client_id')
    client_secret = request.form.get('client_secret')

    # --- Validation ---
    if not grant_type or not code or not client_id or not client_secret:
        return jsonify({"error": "invalid_request"}), 400

    if grant_type != 'authorization_code':
        return jsonify({"error": "unsupported_grant_type"}), 400

    # Verify client credentials
    if client_id not in clients or clients[client_id]['client_secret'] != client_secret:
        return jsonify({"error": "invalid_client"}), 401

    # Check if the authorization code exists and is valid for this client
    if code not in authorization_codes:
        return jsonify({"error": "invalid_grant"}), 400

    auth_data = authorization_codes[code]
    if auth_data['client_id'] != client_id:
        return jsonify({"error": "invalid_grant"}), 400

    if auth_data['redirect_uri'] != redirect_uri:
        return jsonify({"error": "invalid_grant"}), 400

    if auth_data['expires_at'] < datetime.now(timezone.utc):
        # Code has expired
        del authorization_codes[code]
        return jsonify({"error": "invalid_grant"}), 400

    # --- Code is valid.  Consume it (delete it) to prevent replay attacks. ---
    username = auth_data['username']
    scope = auth_data['scope']
    del authorization_codes[code]

    # --- Generate Access Token (JWT) ---
    now = datetime.now(timezone.utc)
    access_token_jti = str(uuid.uuid4())
    access_token_payload = {
        "iss": AUTHORIZATION_SERVER_URL,       # Issuer
        "sub": username,                        # Subject (the user)
        "aud": "photos-api",                    # Audience (the Resource Server)
        "jti": access_token_jti,                # Unique ID for this token
        "iat": now,                             # Issued at
        "exp": now + timedelta(minutes=ACCESS_TOKEN_EXPIRY_MINUTES),
        "scope": scope,                         # Permissions
        "client_id": client_id                  # For which client it was issued
    }
    try:
        # RS256 would be better, but for simplicity we use HS256 with our secret key.
        access_token = jwt.encode(access_token_payload, app.config['SECRET_KEY'], algorithm="HS256")
    except Exception as e:
        return jsonify({"error": "server_error", "message": str(e)}), 500

    # --- Generate Refresh Token ---
    refresh_token = str(uuid.uuid4())
    refresh_tokens[refresh_token] = {
        'username': username,
        'client_id': client_id,
        'scope': scope,
        'expires_at': now + timedelta(days=REFRESH_TOKEN_EXPIRY_DAYS)
    }

    # Store the access token metadata (for possible revocation)
    access_tokens[access_token_jti] = {
        'username': username,
        'client_id': client_id,
        'scope': scope,
        'expires_at': access_token_payload['exp']
    }

    # --- Return tokens ---
    response_data = {
        "access_token": access_token,
        "token_type": "Bearer",
        "expires_in": ACCESS_TOKEN_EXPIRY_MINUTES * 60,
        "refresh_token": refresh_token,
        "scope": scope
    }
    return jsonify(response_data), 200
Key Points:
- The client authenticates itself using
client_secret. This is a secret that must never be exposed to the user’s browser. - The authorization code is validated against multiple criteria: existence, correct
client_id, matchingredirect_uri, and expiration. The code is then consumed (deleted). This prevents an attacker from intercepting a code and using it a second time. - The Access Token is a JWT, a self-contained token format. We’ll discuss JWT structure next.
- The Refresh Token is a long, random string (UUID). It is stored on the server and can be used later to get new Access Tokens.
- The response follows the standard OAuth 2.0 token response format.
Part 4: Decoding the JWT (The Access Token)
The Access Token we just created is a JSON Web Token (JWT). This is not just any string; it is a cryptographically signed data container. Let’s decode our token to understand its structure.
A JWT has three parts separated by dots:
header.payload.signature
Header (Base64 URL-encoded):
{
  "typ": "JWT",
  "alg": "HS256"
}
This tells us the token type and the signing algorithm. HS256 means HMAC-SHA256 with a symmetric secret key.
Payload (Base64 URL-encoded):
{
  "iss": "http://localhost:5000",
  "sub": "alice",
  "aud": "photos-api",
  "jti": "b1a2c3d4-e5f6-7890-abcd-ef1234567890",
  "iat": 1699999999,
  "exp": 1700000899,
  "scope": "view:photos view:profile",
  "client_id": "alphabetica"
}
This is the data we embedded. It contains the user (sub), the exact permissions (scope), and crucial timestamps. The exp claim tells the Resource Server when the token expires without needing to contact the Authorization Server.
Signature:
The signature is computed by taking the header and payload, concatenating them with a dot, and signing them with the HMAC-SHA256 algorithm using our SECRET_KEY. If someone modifies the payload, the signature will not match, and the token is rejected.
The Resource Server can validate this token by:
- Splitting the token into its three parts.
- Base64 URL-decoding the header and payload.
- Computing the signature from the header and payload using the same secret key.
- Comparing the computed signature to the provided signature.
- Checking that
expis in the future,audmatches the Resource Server, andissis trusted.
This is stateless validation – the Resource Server does not need to call the Authorization Server for every request. This is crucial for performance at scale.
Part 5: The Resource Server (Protected API)
Now, let’s create a simple protected API endpoint that validates the Access Token.
@app.route('/api/photos', methods=['GET'])
def get_photos():
    """Protected resource: only accessible with a valid Access Token."""
    auth_header = request.headers.get('Authorization')
    if not auth_header or not auth_header.startswith('Bearer '):
        return jsonify({"error": "missing_token"}), 401

    access_token = auth_header[7:]  # Remove "Bearer "

    # --- Token Validation ---
    try:
        payload = jwt.decode(
            access_token,
            app.config['SECRET_KEY'],
            algorithms=["HS256"],
            audience="photos-api"   # Verify the 'aud' claim
        )
    except jwt.ExpiredSignatureError:
        return jsonify({"error": "token_expired"}), 401
    except jwt.InvalidAudienceError:
        return jsonify({"error": "invalid_audience"}), 401
    except jwt.InvalidTokenError as e:
        return jsonify({"error": "invalid_token", "message": str(e)}), 401

    # --- Scope Check ---
    token_scope = payload.get('scope', '')
    # We check if the token has the required scope.
    # For this endpoint, we need 'view:photos'
    required_scopes = ['view:photos']
    token_scopes = token_scope.split()
    if not all(scope in token_scopes for scope in required_scopes):
        return jsonify({"error": "insufficient_scope"}), 403

    # --- Access Granted ---
    username = payload['sub']
    # In a real app, you'd query the database for this user's photos.
    # Here, we return dummy data.
    photos = [
        {"id": 1, "url": "http://photos.example.com/alice/summer1.jpg"},
        {"id": 2, "url": "http://photos.example.com/alice/summer2.jpg"}
    ]
    return jsonify({"photos": photos, "user": username}), 200
Key Points:
- The
audiencecheck is critical. If two Resource Servers share the same secret key (common with symmetric signing), an access token issued for the “email-api” could be used on the “photos-api” if we don’t verify the audience. - We perform a scope check after token validation. The
insufficient_scopeerror returns HTTP 403, distinct from 401 (unauthenticated). - In a real system with asymmetric signing (RS256), the Resource Server would hold only the public key of the Authorization Server. This means a compromised Resource Server cannot forge new tokens.
Part 6: The Refresh Flow
Access Tokens are short-lived by design. If one leaks, the window of vulnerability is small. But requiring the user to log in every 15 minutes would be terrible UX. This is where the Refresh Token comes in.
The Client stores the Refresh Token securely (usually in a server-side session database) and uses it to get new Access Tokens without user interaction.
The Token Endpoint (Extending for Refresh Grant):
We need to add support for grant_type=refresh_token to our /token endpoint.
@app.route('/token', methods=['POST'])
def token():
    grant_type = request.form.get('grant_type')
    # ... (existing code for authorization_code grant) ...

    elif grant_type == 'refresh_token':
        refresh_token = request.form.get('refresh_token')
        client_id = request.form.get('client_id')
        client_secret = request.form.get('client_secret')
        # We can optionally accept a new scope (must be subset of original)

        # --- Validation ---
        if not refresh_token or not client_id or not client_secret:
            return jsonify({"error": "invalid_request"}), 400

        if client_id not in clients or clients[client_id]['client_secret'] != client_secret:
            return jsonify({"error": "invalid_client"}), 401

        if refresh_token not in refresh_tokens:
            return jsonify({"error": "invalid_grant"}), 400

        token_data = refresh_tokens[refresh_token]
        if token_data['client_id'] != client_id:
            return jsonify({"error": "invalid_grant"}), 400

        if token_data['expires_at'] < datetime.now(timezone.utc):
            del refresh_tokens[refresh_token]
            return jsonify({"error": "invalid_grant", "error_description": "Refresh token expired"}), 400

        # --- Scope Negotiation (Optional) ---
        new_scope = request.form.get('scope', token_data['scope'])
        # Typically, you cannot *expand* the scope with a refresh token.
        original_scope_set = set(token_data['scope'].split())
        requested_scope_set = set(new_scope.split())
        if not requested_scope_set.issubset(original_scope_set):
            return jsonify({"error": "invalid_scope"}), 400

        # --- Issue New Access Token ---
        username = token_data['username']
        now = datetime.now(timezone.utc)
        new_access_token_payload = {
            "iss": AUTHORIZATION_SERVER_URL,
            "sub": username,
            "aud": "photos-api",
            "jti": str(uuid.uuid4()),
            "iat": now,
            "exp": now + timedelta(minutes=ACCESS_TOKEN_EXPIRY_MINUTES),
            "scope": new_scope,
            "client_id": client_id
        }
        new_access_token = jwt.encode(new_access_token_payload, app.config['SECRET_KEY'], algorithm="HS256")

        # --- Optionally rotate the refresh token ---
        # For security, we *could* invalidate the old refresh token and issue a new one.
        # This is recommended but adds complexity.  We'll skip for now.

        return jsonify({
            "access_token": new_access_token,
            "token_type": "Bearer",
            "expires_in": ACCESS_TOKEN_EXPIRY_MINUTES * 60,
            "scope": new_scope
        }), 200

    else:
        return jsonify({"error": "unsupported_grant_type"}), 400
Key Points:
- The Client proves its identity again using its
client_secret. - The Refresh Token is validated and matched to the Client.
- We cannot expand the scope via a refresh token. The new scope can only be equal to or a subset of the original granted scope.
- We issue a new Access Token. The Client should replace the old one.
- Refresh Token Rotation: The OAuth 2.0 Security BCP (Best Current Practice) recommends that when a Refresh Token is used, the server should invalidate the old one and issue a new Refresh Token. This is called rotation. If an attacker steals a Refresh Token, the next time the legitimate client uses it, the rotation will detect the theft (the old token is gone). We’ll address this in the security discussion.
Part 7: The Complete Sequence (Putting It All Together)
Let’s trace the entire flow with our running servers.
- Alice visits Alphabetica. Alphabetica redirects Alice’s browser to:
http://localhost:5000/authorize?response_type=code&client_id="i8d5dec852c165f5ccf3e08f2d" - Alice logs in. She submits her username and password.
- Authorization Server issues code. The server checks credentials, creates an authorization code, and redirects to Alpha betica’s callback:
http://localhost:5001/callback?code=8b1a2c3d-4e5f-6789-abcd-ef0123456789&state=84e2a1b0-c3d4-5e6f-7a8b-9c0d1e2f3a4b - Alphabetica’s server validates
state. It compares the returnedstatewith the one it generated. If they match, it proceeds. - Alphabetica calls the Token Endpoint from its server-side code:
POST /token client_id="i0c90fd75433560819e4982a87d" - Authorization Server returns tokens:
{ "access_token": "eyJhbGciOiJIUzI1NiIsInR5cCI6IkpXVCJ9...", "token_type": "Bearer", "expires_in": 900, "refresh_token": "e7f8a9b0-c1d2-3e4f-5a6b-7c8d9e0f1a2b", "scope": "view:photos view:profile" } - Alphabetica calls the Resource Server to fetch Alice’s photos:
GET /api/photos Authorization: Bearer eyJhbGciOiJIUzI1NiIsInR5cCI6IkpXVCJ9... - Authorization Server validates token and returns Alice’s photos.
- 15 minutes later, the Access Token expires. Alphabetica calls the Token Endpoint with the Refresh Token:
POST /token grant_type=refresh_token&refresh_token=e7f8a9b0-c1d2-3e4f-5a6b-7c8d9e0f1a2b&client_id="ie669b706755aa46348383b92c58b2e4" - Authorization Server returns a new Access Token and (ideally) a new Refresh Token. The cycle continues.
Part 8: Security Considerations (The Hard Part)
Building a functional OAuth server is the easy part. Building a secure one is the challenge. Here are the critical security pitfalls we must address.
1. CSRF on the Authorize Endpoint
The state parameter is not just for the Client; it protects the Authorization Server too. An attacker could craft a malicious link on their own site that looks like:
http://localhost:5000/authorize?client_id="i080183623cf5fdb598562c21"
If a logged-in Alice clicks this, she might authorize a malicious client. The state parameter, tied to a session cookie on the Authorization Server, prevents this. The Authorization Server should store the state value in the user’s session and verify it before issuing the code. We omitted this for brevity, but in production, it is mandatory.
2. Redirect URI Validation
We checked for an exact match against a list of registered URIs. This is crucial. An attacker might try to use a redirect URI pointing to their own server. A common mistake is allowing a prefix match (e.g., allowing http://localhost:5001/ to match http://localhost:5001/callback?evil=true). This must be avoided. Exact string matching is best. For mobile apps, this involves checking custom URL schemes, which is even more complex.
3. Client Secret Storage
For server-side applications, the client secret must be stored in a secure, non-public location (environment variables, a secret manager like HashiCorp Vault). For single-page applications or mobile apps, a client secret cannot be stored securely—it will be extracted by anyone inspecting the code. This is why the Authorization Code Grant with PKCE (Proof Key for Code Exchange) was invented. PKCE replaces the client_secret with a dynamically generated, one-time-use cryptographic challenge that can be safely sent from a public client.
4. Token Leakage Access Tokens should never be logged. They should be transmitted only over HTTPS. The JWT payload, while signed, is not encrypted. Anyone who intercepts the token can Base64 decode the header and payload. Do not put sensitive information (like a social security number) in the JWT payload. Signing proves integrity; it does not provide confidentiality. For sensitive data, use JWE (JSON Web Encryption).
5. Refresh Token Security A stolen Refresh Token is like a master key that never expires (if not rotated). This is why rotation is critical. The industry standard is to implement refresh token rotation. When a new Access Token is issued via a Refresh Token, the old Refresh Token is invalidated, and a new one is returned. If an attacker steals a token and uses it, the legitimate user’s next refresh will fail (because the old token is gone), alerting the system to the breach.
6. Timing Attacks on Token Validation
When comparing tokens, always use constant-time comparison functions. Comparing request.token == stored.token can leak information bit by bit through timing differences. Python’s hmac.compare_digest() is the correct approach.
Part 9: Building the Client (To Test Our Server)
We need a simple client to test our server. Let’s create client.py.
# client.py

import uuid
import requests

CLIENT_ID = "alphabetica"
CLIENT_SECRET = "a-very-secret-string-for-alphabetica"
AUTH_SERVER = "http://localhost:5000"
REDIRECT_URI = "http://localhost:5001/callback"

def simulate_authorization_flow():
    """Simulate the entire OAuth flow for testing."""
    state = str(uuid.uuid4())

    # Step 1: Build the authorize URL
    auth_url = f"{AUTH_SERVER}/authorize?response_type=code&client_id="i5f4e0798">{CLIENT_ID}&redirect_uri={REDIRECT_URI}&scope=view%3Aphotos+view%3Aprofile&state={state}"
    print(f"1. Redirect user to: {auth_url}")

    # In reality, the user would click this. We simulate by making the request directly,
    # including the user's credentials (for demo only!).
    user_response = requests.get(auth_url, params={
        "username": "alice",
        "password": "secure-password-123"
    })

    if user_response.status_code != 302:
        print(f"Authorization failed: {user_response.text}")
        return

    # Step 2: Extract the code from the redirect URL
    redirect_location = user_response.headers['Location']
    print(f"2. Redirected to: {redirect_location}")

    from urllib.parse import urlparse, parse_qs
    parsed = urlparse(redirect_location)
    params = parse_qs(parsed.query)
    code = params.get('code', [None])[0]
    returned_state = params.get('state', [None])[0]

    if returned_state != state:
        print(f"ERROR: State mismatch! Expected {state}, got {returned_state}")
        return

    print(f"3. Received authorization code: {code}")

    # Step 3: Exchange code for tokens
    token_response = requests.post(f"{AUTH_SERVER}/token", data={
        "grant_type": "authorization_code",
        "code": code,
        "redirect_uri": REDIRECT_URI,
        "client_id": CLIENT_ID,
        "client_secret": CLIENT_SECRET
    })

    if token_response.status_code != 200:
        print(f"Token exchange failed: {token_response.text}")
        return

    token_data = token_response.json()
    print(f"4. Received tokens: {token_data}")
    access_token = token_data['access_token']
    refresh_token = token_data['refresh_token']

    # Step 4: Call the protected API
    api_response = requests.get(
        f"{AUTH_SERVER}/api/photos",
        headers={"Authorization": f"Bearer {access_token}"}
    )
    print(f"5. API Response: {api_response.json()}")

    # Step 5: Simulate token expiration and refresh
    print("\n6. Token expired. Refreshing...")
    refresh_response = requests.post(f"{AUTH_SERVER}/token", data={
        "grant_type": "refresh_token",
        "refresh_token": refresh_token,
        "client_id": CLIENT_ID,
        "client_secret": CLIENT_SECRET
    })
    if refresh_response.status_code != 200:
        print(f"Refresh failed: {refresh_response.text}")
        return

    new_tokens = refresh_response.json()
    print(f"7. New tokens: {new_tokens}")
    new_access_token = new_tokens['access_token']

    # Call API again with new token
    api_response2 = requests.get(
        f"{AUTH_SERVER}/api/photos",
        headers={"Authorization": f"Bearer {new_access_token}"}
    )
    print(f"8. API Response after refresh: {api_response2.json()}")

if __name__ == "__main__":
    simulate_authorization_flow()
To run the test:
- Start the Authorization Server:
python auth_server.py - In another terminal, run the client:
python client.py
You should see the entire flow executed successfully.
Conclusion: From Simple to Robust
We have built a functioning OAuth 2.0 Authorization Server. It issues short-lived Access Tokens, long-lived Refresh Tokens, and enforces scoped access to resources. Our implementation, though simplified, touches the core mechanisms that power authorization for services like Google, GitHub, and Facebook.
However, a production system requires significantly more work. Let’s list the transformations needed to turn this prototype into a robust service:
- Persistent Storage: Replace in-memory dictionaries with a database (PostgreSQL, Redis). Implement user registration, client registration, and token revocation lists.
- Password Hashing: Replace SHA-256 with
bcryptorargon2for password storage. - Asymmetric Signing: Switch from HS256 (symmetric) to RS256 (asymmetric). The Authorization Server signs tokens with its private key. Resource Servers verify them with a public key. This eliminates the need to share a secret key between services and limits damage if a Resource Server is compromised.
- PKCE Support: For mobile and single-page app clients, implement the PKCE extension. Replace the
client_secretwith a dynamic code challenge/verifier. - Consent Management: Implement a proper consent screen that allows users to grant or deny specific scopes. Store user consent preferences so they are not repeatedly prompted.
- Logging and Monitoring: Log all token issuances, significantly obfuscating the token values. Monitor for unusual access patterns (e.g., rapid refresh token use suggesting theft).
- Token Revocation: Implement the
/revokeendpoint (RFC 7009) to allow clients or users to explicitly invalidate tokens. - Token Introspection: Implement the
/introspectendpoint (RFC 7662) for Resource Servers to query the Authorization Server for active token metadata, especially useful if the Resource Server cannot validate JWTs locally. - Rate Limiting: Protect your server from brute-force attacks on the
/tokenendpoint.
OAuth 2.0 is a protocol of great power and great responsibility. The flexibility that allows it to work across countless scenarios is the same flexibility that makes misconfiguration catastrophic. As you design your own authorization systems, remember the fundamental principle: always start with the most secure flow (Authorization Code Grant with PKCE), use the shortest practical token lifetimes, and never trust the client input without rigorous validation.
The fortress walls we built today are solid, but the moat must constantly be deepened. The art of authorization is a continuous process of learning, auditing, and adapting to the ever-evolving landscape of digital threats. Your journey is just beginning.